

There’s nothing quite like the crunch of a serrated knife breaking through a warm, golden loaf, followed by that unmistakable wave of toasted garlic and herbs filling the kitchen. It’s the side dish everyone secretly shows up for, and yet, homemade versions often fall short, turning out soggy, bland, or nowhere near the restaurant-style favorite we crave. This crusty garlic bread fixes all of that with a simple, reliable method that delivers bold flavor and a perfectly crisp bite every single time.
Instead of relying on frozen shortcuts, this approach uses a fresh Italian or French loaf paired with a balanced garlic butter that melts, bubbles, and soaks in just enough without weighing the bread down. No fancy tools, no long prep just smart techniques that work. Whether you keep it classic with parsley or finish it with a cheesy upgrade, you can trust this recipe to deliver bakery-level results in under 20 minutes.
Choosing the Right Loaf for Ultra-Crusty Garlic Bread
The foundation of great garlic bread isn’t the butter or the garlic it’s the bread itself. Choosing the right loaf determines whether you end up with that irresistible crisp exterior and soft, buttery interior or a disappointing, soggy result. Here’s how the most popular options compare.
Italian Loaf
- Wider shape with a softer, airier crumb
- Absorbs garlic butter evenly without collapsing
- Bakes up golden with a balanced crunch-to-soft ratio
This is the go-to choice for classic, family-style garlic bread and works beautifully for open-faced baking.
French Loaf (Baguette)
- Narrower with a thicker, chewier crust
- Delivers a firmer crunch and rustic texture
- Ideal if you love extra crisp edges and defined slices
French bread is perfect for those who want bold texture and a bakery-style bite.
Sourdough
- Naturally tangy flavor that contrasts with rich butter
- Denser crumb can limit butter absorption
- Crust is often thicker and harder
While delicious, sourdough can overpower the garlic butter and doesn’t always deliver the classic restaurant feel most people expect.
Final Verdict
For this recipe, a standard Italian loaf or French loaf produces the most reliable, crowd-pleasing results. Both allow the garlic butter to melt into the bread while still baking up beautifully crisp on the edges, exactly what you want from a true garlic bread side dish.
Simple Ingredients for Bold Garlic Bread Flavor
One of the best things about this recipe is how short and familiar the ingredient list is. Every item plays a specific role in creating that signature crisp exterior, rich garlic flavor, and soft interior without overcomplicating things.
Here’s why each ingredient matters and how to get the best results from it:
- Italian loaf or French loaf (1 pound)
The structure of the bread determines the final texture. These loaves hold up to high heat and absorb butter without turning soggy. - Unsalted butter (½ cup, softened)
Softened butter spreads evenly and melts gradually in the oven, allowing the garlic to infuse the bread instead of pooling on top. Salted butter can be used, but seasoning should be adjusted carefully. - Fresh garlic (4 cloves, finely minced)
Fresh garlic delivers the sharp, savory bite that defines great garlic bread. Finely mincing ensures even distribution and prevents burning. - Fresh parsley (1 tablespoon, finely chopped)
Adds freshness and color that balances the richness of the butter. - Sea salt (⅛ teaspoon)
Just enough to enhance flavor without overpowering the garlic or butter.
Optional Cheese Add-Ins
- Freshly grated Parmesan adds salty, nutty depth
- Shredded mozzarella creates gooey melt and golden stretch
Both work beautifully, and you can choose one or combine them depending on your mood.
For Garnishing
- Extra parsley and chives add a fresh finish and visual appeal right before serving.
Keeping the ingredients simple is exactly what allows this loaf to shine. When each component is used correctly, you get maximum flavor with minimal effort.
Essential Tools for Perfect Garlic Bread at Home
You don’t need any specialty gadgets to make great garlic bread, just a few reliable kitchen basics that help everything bake evenly and clean up easily.
Here’s what you’ll need and why each item matters:
- Large baking sheet
Gives the bread enough space to bake evenly without steaming. Crowding traps moisture, which can soften the crust. - Parchment paper or aluminum foil
Prevents sticking and makes cleanup quick. Parchment encourages better browning, while foil works well if lightly greased. - Serrated bread knife
Essential for slicing cleanly through the loaf without crushing the crumb or tearing the crust. - Small mixing bowl
Allows you to thoroughly combine the butter, garlic, and herbs so every bite is evenly seasoned. - Silicone spatula or butter knife
Helps spread the garlic butter evenly all the way to the edges, crucial for that crisp, golden finish.
Using the right tools ensures the bread bakes open-faced and evenly, giving you that crave-worthy crunch instead of a soft, steamed loaf.
Step-by-Step Instructions for Foolproof Garlic Bread
This method is intentionally simple and fast, but each step matters. Baking the bread open-faced at high heat is what creates that crisp exterior while keeping the inside soft and buttery.
Step 1: Prep the Oven and Bread
- Preheat the oven to 425°F so the bread starts crisping immediately.
- Line a large baking sheet with parchment paper or foil.
- Slice the loaf lengthwise and place it cut-side up on the baking sheet.
High heat + exposed crumb = instant crunch without sogginess.
Step 2: Make the Garlic Butter
- In a medium bowl, mix the softened butter, minced garlic, parsley, and salt until fully combined.
- Spread the mixture evenly over the bread, reaching all the way to the edges.
An even layer ensures consistent flavor and browning across the entire loaf.
")
Step 3: Bake Until Golden
- Bake for 10–15 minutes, until the edges turn lightly golden.
- For cheese lovers: add Parmesan or mozzarella during the last 2 minutes of baking.
- Prefer extra crispiness? Bake an additional 3–5 minutes, watching closely to prevent burning.
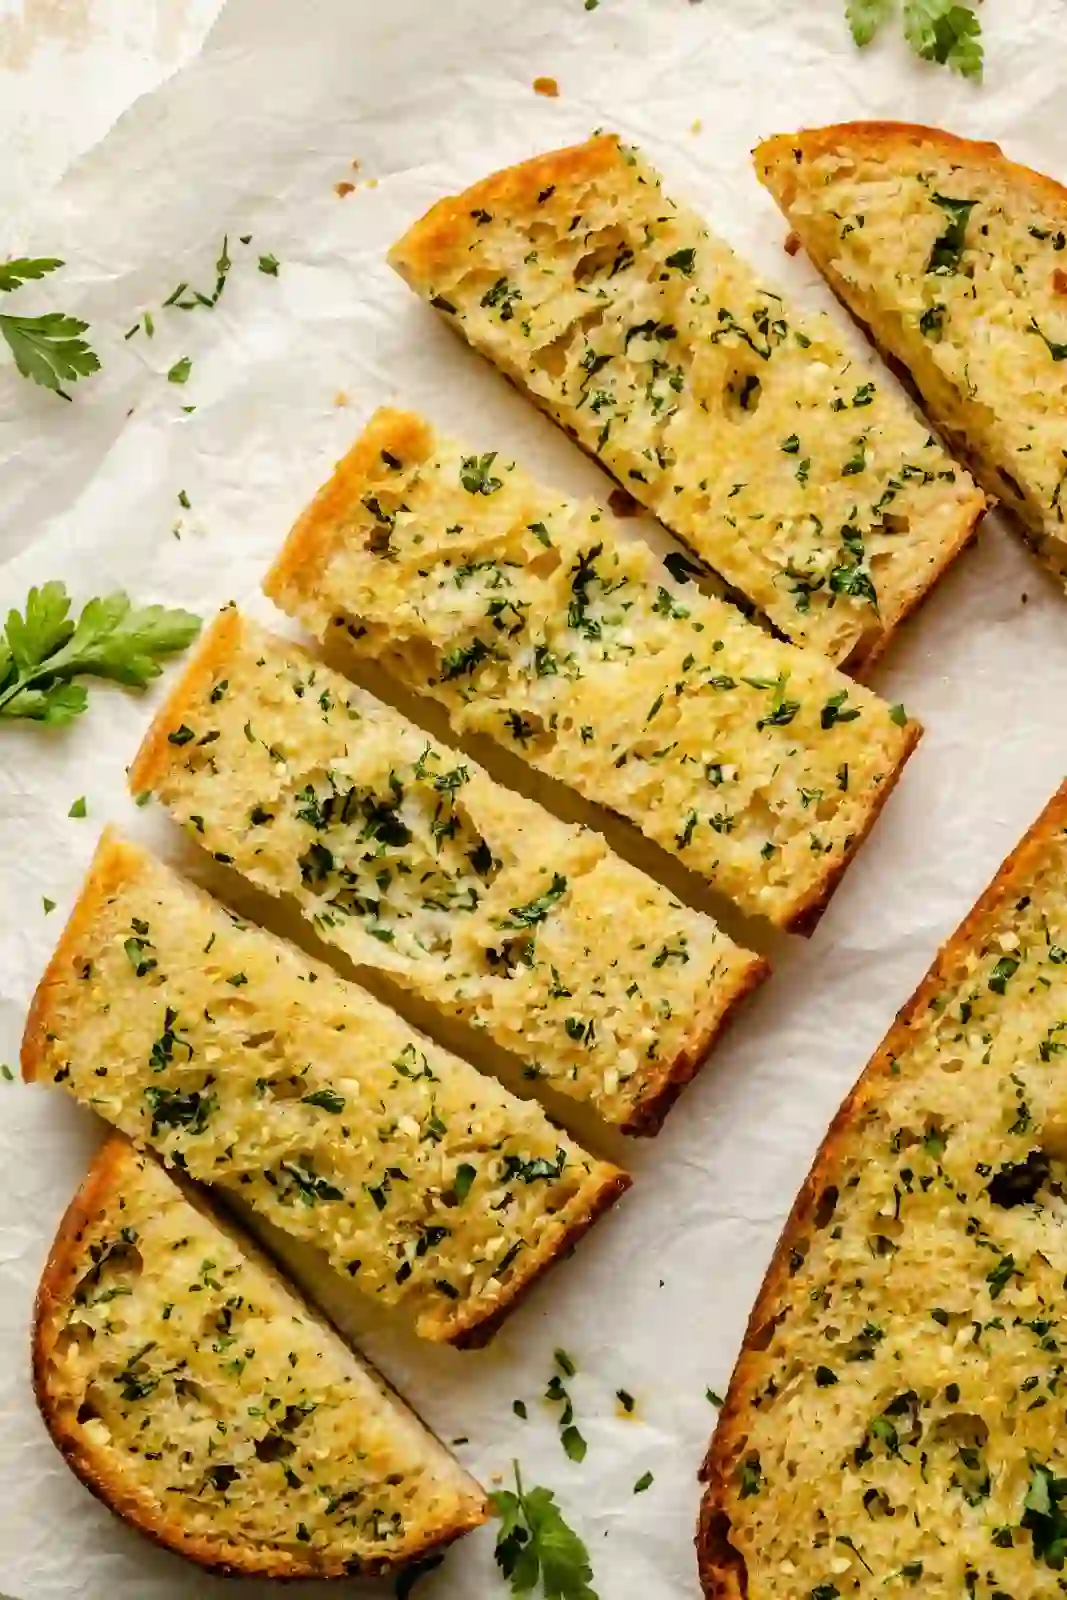
The result should be a golden, bubbling surface with a crisp bite and rich garlic aroma.
")
Pro Tips for a Flavor-Packed Garlic Butter Spread
Garlic bread might seem simple, but small details make the difference between good and unforgettable. These pro tips ensure your butter spreads evenly, bakes beautifully, and delivers bold flavor without burning.
Room Temperature Butter Is Non-Negotiable
- Butter should be soft but not melted
- Melted butter soaks too deeply and can make the bread greasy
- Softened butter clings to the surface, creating a crisp, flavorful top layer
If your butter is too cold, let it sit out for 30–45 minutes before mixing.
Always Use Fresh Garlic
- Freshly minced cloves provide sharp, aromatic flavor
- Garlic powder burns quickly at 425°F and tastes bitter
- Fine mincing ensures even distribution and prevents hot spots
Mind the Cheese Timing
- Parmesan can go directly on the butter before baking
- Mozzarella should be added near the end to avoid over-browning
- For bubbly, golden spots, switch to broil for the final 60 seconds, but watch closely
These small adjustments elevate the final result, giving your loaf that unmistakable bakery-style finish people expect from great garlic bread.
Easy Variations to Customize Your Garlic Bread
Once you’ve mastered the base recipe, it’s incredibly easy to customize this loaf to match your mood, your meal, or what you have on hand. These variations keep the method the same while adding exciting flavor twists without sacrificing that crisp texture.
Spicy Kick
- Add ½ teaspoon red pepper flakes to the butter mixture
- Provides gentle heat that balances the richness of the butter
- Perfect alongside pasta or hearty soups
Cheesy Overload
- Mix grated Parmesan directly into the garlic butter
- Top with mozzarella during the final minutes of baking
- Creates layers of salty, gooey flavor with golden edges
This version leans into indulgence while still baking up beautifully crisp.
Roasted Garlic Upgrade
- Replace raw minced garlic with 6 cloves of roasted garlic paste
- Produces a sweeter, mellow flavor without sharp bite
- Ideal if you love depth without overpowering garlic heat
This variation works especially well when you want a more rounded, almost spreadable garlic flavor.
These swaps let you tailor the bread to your meal while keeping the same foolproof baking technique intact
What to Serve With Crusty Garlic Bread
This bread isn’t just a side, it’s a supporting star that makes the entire meal feel complete. Its crisp edges and buttery center pair especially well with saucy, savory dishes that benefit from a little extra crunch.
Classic Pasta Pairings
- Spaghetti Bolognese or Lasagna
The bread is perfect for soaking up rich tomato or meat sauces without falling apart.
Soup Night Favorite
The sturdy crust makes this ideal for dipping, giving you texture without sogginess.
Salad Side
- Caesar Salad with homemade croutons
Serve the bread sliced into smaller pieces or alongside the salad for a balanced plate that feels restaurant-worthy.
Whether it’s a casual weeknight dinner or a comfort-food spread, this loaf fits effortlessly into almost any menu.
How to Store, Reheat, and Freeze Garlic Bread Properly

Garlic bread is best fresh from the oven, but with the right handling, you can still enjoy great texture and flavor later on without ending up with a soft or chewy loaf.
How to Store Leftovers
- Let the bread cool completely
- Wrap tightly in aluminum foil
- Store at room temperature for up to 2 days
Avoid plastic bags, which trap moisture and soften the crust.
How to Reheat Without Losing Crunch
- Keep the bread wrapped in foil
- Reheat in a 350°F oven for about 10 minutes
- For extra crisp edges, unwrap for the final 2 minutes
Microwaving is not recommended it makes the bread rubbery and dulls the garlic flavor.
How to Freeze (Unbaked – Best Method)
- Spread the garlic butter mixture on the sliced loaf
- Place on a baking sheet and flash freeze for 1 hour
- Wrap tightly in plastic wrap, then foil
- Bake directly from frozen, adding 3–5 minutes to the bake time
Freezing before baking preserves both texture and flavor, making this a perfect make-ahead option for busy nights.
Conclusion
Making great garlic bread at home is all about using a good loaf, fresh garlic, and the right baking technique. When you bake it open-faced at high heat, you get those golden, crisp edges with a soft, buttery center that tastes just like your favorite restaurant version. This bread pairs beautifully with pasta, soups, or an easy one-pan main dish like this Garlic Parmesan Chicken Breast Recipe for a complete, comforting meal.
I can’t wait for you to try this recipe in your own kitchen. Whether you keep it classic or add mozzarella for a gooey finish, it’s sure to disappear fast. If you make it, leave a ⭐ rating below, share your thoughts in the comments, and save it to your “Best Side Dishes” board on Pinterest for your next pasta night.
Recipe FAQs

Homemade Crusty Garlic Bread That’s Perfectly Crisp
Equipment
- Large baking sheet
- Parchment paper or aluminum foil
- Bread knife (serrated)
- Small mixing bowl
- Silicone spatula or butter knife
Ingredients
- 1 pound Italian loaf or French loaf
- ½ cup softened unsalted butter (or salted)
- 4 cloves garlic, finely minced
- 1 tbsp finely chopped fresh parsley
- ⅛ tsp sea salt
- ¼ cup freshly grated parmesan cheese (optional)
- ½ cup shredded mozzarella cheese (optional)
- extra parsley and chives (for garnish)
Instructions
- Preheat oven to 425 degrees F and line a large baking sheet with parchment paper or foil. Slice bread in half lengthwise and place on a large baking sheet, cut sides up.
- In a medium bowl, mix butter, garlic, parsley and salt together until well combined. Spread evenly over bread.
- Bake for 10-15 minutes or until slightly golden brown on the edges. If you want to add cheese, add it the last 2 minutes of baking. If you like a crispier garlic bread, bake for 3-5 minutes more, watching carefully until it is as golden as you like.


 13")
